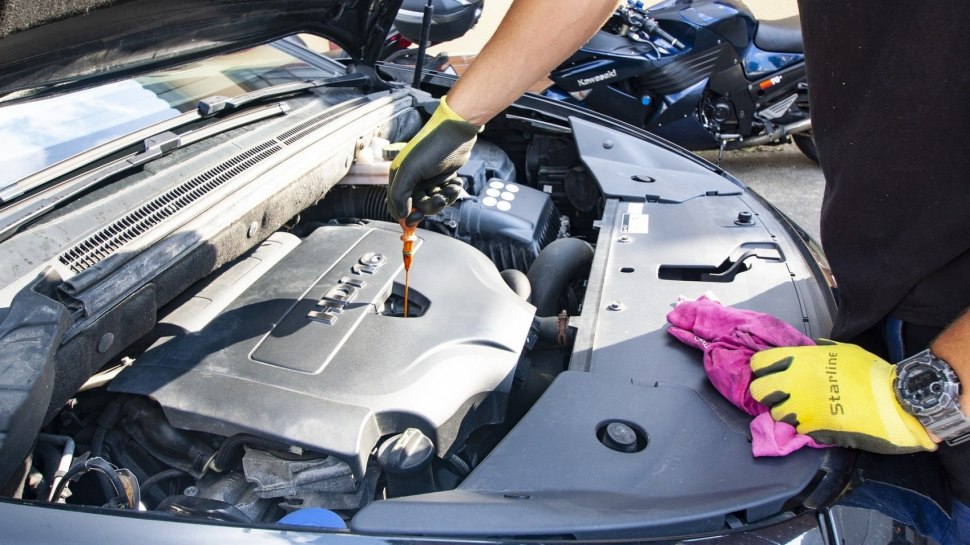
A car’s engine is a sophisticated mechanism, consisting of a vast variety of moving components. It generates and supplies the power needed for the vehicle to move. But to do so, the engine needs a crucially important fluid - motor oil. The thick liquid lubricates the mechanical components inside the engine’s system, reducing the friction-generated heat and process of wear and tear. What’s more, when passing through the engine, it scoops all the dirt and debris from its insides, taking the particles to the oil filter.
When not in use, the oil substance is housed in a special compartment where it can also be replaced with new oil, when needed. This compartment is called a crankcase. It consists of two parts - an upper and a lower one, the latter being responsible for the oil liquid.
In terms of construction, most crankcases consist of aluminum or steel bowl-like compartments, fixed on the lower section of the vehicle's engine.
The crankcase’s main function is relatively simple, yet significant. Usually, when the engine’s not working, the crankcase collects the oil liquid, acting as a reservoir. This enables the easy and relatively fast replacement of the old fluid with new oil via the crankcase’s plug. When there’s a need for adding or draining the oil, the plugs can easily be unscrewed and then screwed back into place.
Over time, due to the stressful and harsh-working environment, the crankcase will inevitably wear out. To inspect it thoroughly and replace it, one may have to remove it from the car’s system. The whole process of taking the crankcase down depends on the type of engine the vehicle has. However, few easy steps can guarantee a trouble-free removing and putting it back to place.
Before we even start with our work on the crankcase, it is important to pull the brake of the vehicle. After that, it could be lifted and put on jack stands. A bucket or other container will be needed for the oil to drain in. The crankcase plug needs to be unscrewed for the liquid to pour.
When the entire oil substance is drained out, it is time to take the oil filter placed there off and to disconnect the sensor that’s responsible for monitoring the oil level.
The next step is to loosen the bolts that hold the crankcase to its place. When this step is over, it is time to remove the crankcase itself. Sometimes, the crankcase may need extra help to get loose.
When it is finally taken off, it is mandatory to scrape off the remnants of all seals (if there are any left) carefully, without scratching the surface.
If everything looks good, it is time to change the old crankcase with the new one. A crankcase gasket should be added. The process of putting the crankcase back in place consists of the same steps as the process of removing, but reversed. An important part of this stage is installing the oil sensor back to its place along with adding fresh motor oil.
Most experts recommend every intervention concerning the crankcase and its adjoined systems and components to be carried out by a professional mechanic. This way, any chance of mistakes or other issues will be minimized.
Some of the most common crankcase issues are leaks and corrosion. If caught and solved on time, it would prevent further mechanical problems. Along with the thorough inspection and potential replacement of the crankcase, it’s good to take a closer look at and, if needed, change the entire oil system — from the oil filter to the pump.
Nowadays, there are two main types of crankcases used — wet and dry. The first one can be found in almost every standard passenger car on the road today. The second one can be found under the hood of race and performance vehicles. Both types differ in terms of their design, price, complexity and work characteristics.

